How to Disable Developer Option in Imobile App
In today’s tech-driven world, mobile apps are becoming increasingly complex and powerful. Whether you are a developer or a user, certain settings can sometimes pose security risks or affect app performance if not used correctly. One such setting is the Developer Options in Android devices. By default, these options are hidden but can be enabled for testing, debugging, and development purposes. While they serve a useful purpose, keeping them enabled on a production device, particularly for non-developers, can expose the device to potential risks and performance issues.
This comprehensive guide will explore how to disable Developer Options in an iMobile app. We’ll dive deep into understanding what these options are, why they should be disabled on production apps, and provide you with a step-by-step process for doing so.
Understanding Developer Options in Android
Before diving into how to disable Developer Options, it is crucial to understand what they are. Developer Options in Android provide access to advanced settings that are primarily meant for app development and debugging. These options include features like:
- USB Debugging – This allows the app or device to communicate with a connected computer for debugging purposes.
- OEM Unlocking – This enables the unlocking of bootloaders, which can be useful for custom ROM installations.
- Stay Awake – Keeps the device’s screen on while charging.
- Mock Locations – Useful for simulating a device’s location for testing apps.
- Show Taps – Displays visual feedback for touch actions.
- Running Services – Shows apps and processes currently running on the device.
These settings are useful for developers during testing and troubleshooting. However, for regular users, keeping them enabled can expose the device to security vulnerabilities and unnecessary distractions.
Why You Should Disable Developer Options in an iMobile App
Disabling Developer Options in an iMobile app offers several benefits:
- Security: Developer options, particularly USB Debugging and OEM unlocking, can leave a device vulnerable to attacks. If left enabled, an unauthorized person with access to your device could gain control or steal sensitive data.
- Performance: Certain Developer Options like “Show Taps” and “Stay Awake” can affect battery life and overall device performance.
- Prevention of Unauthorized Access: If your device is used in a business or sensitive environment, it is essential to restrict access to these settings to prevent tampering or unauthorized access to the system.
Disabling Developer Options ensures that the device remains secure and optimized for everyday use, reducing the risk of accidental changes or malicious exploits.
How to Disable Developer Options in an iMobile App
Disabling Developer Options is a straightforward process that can be done manually through the device’s settings. Let’s walk through the steps:
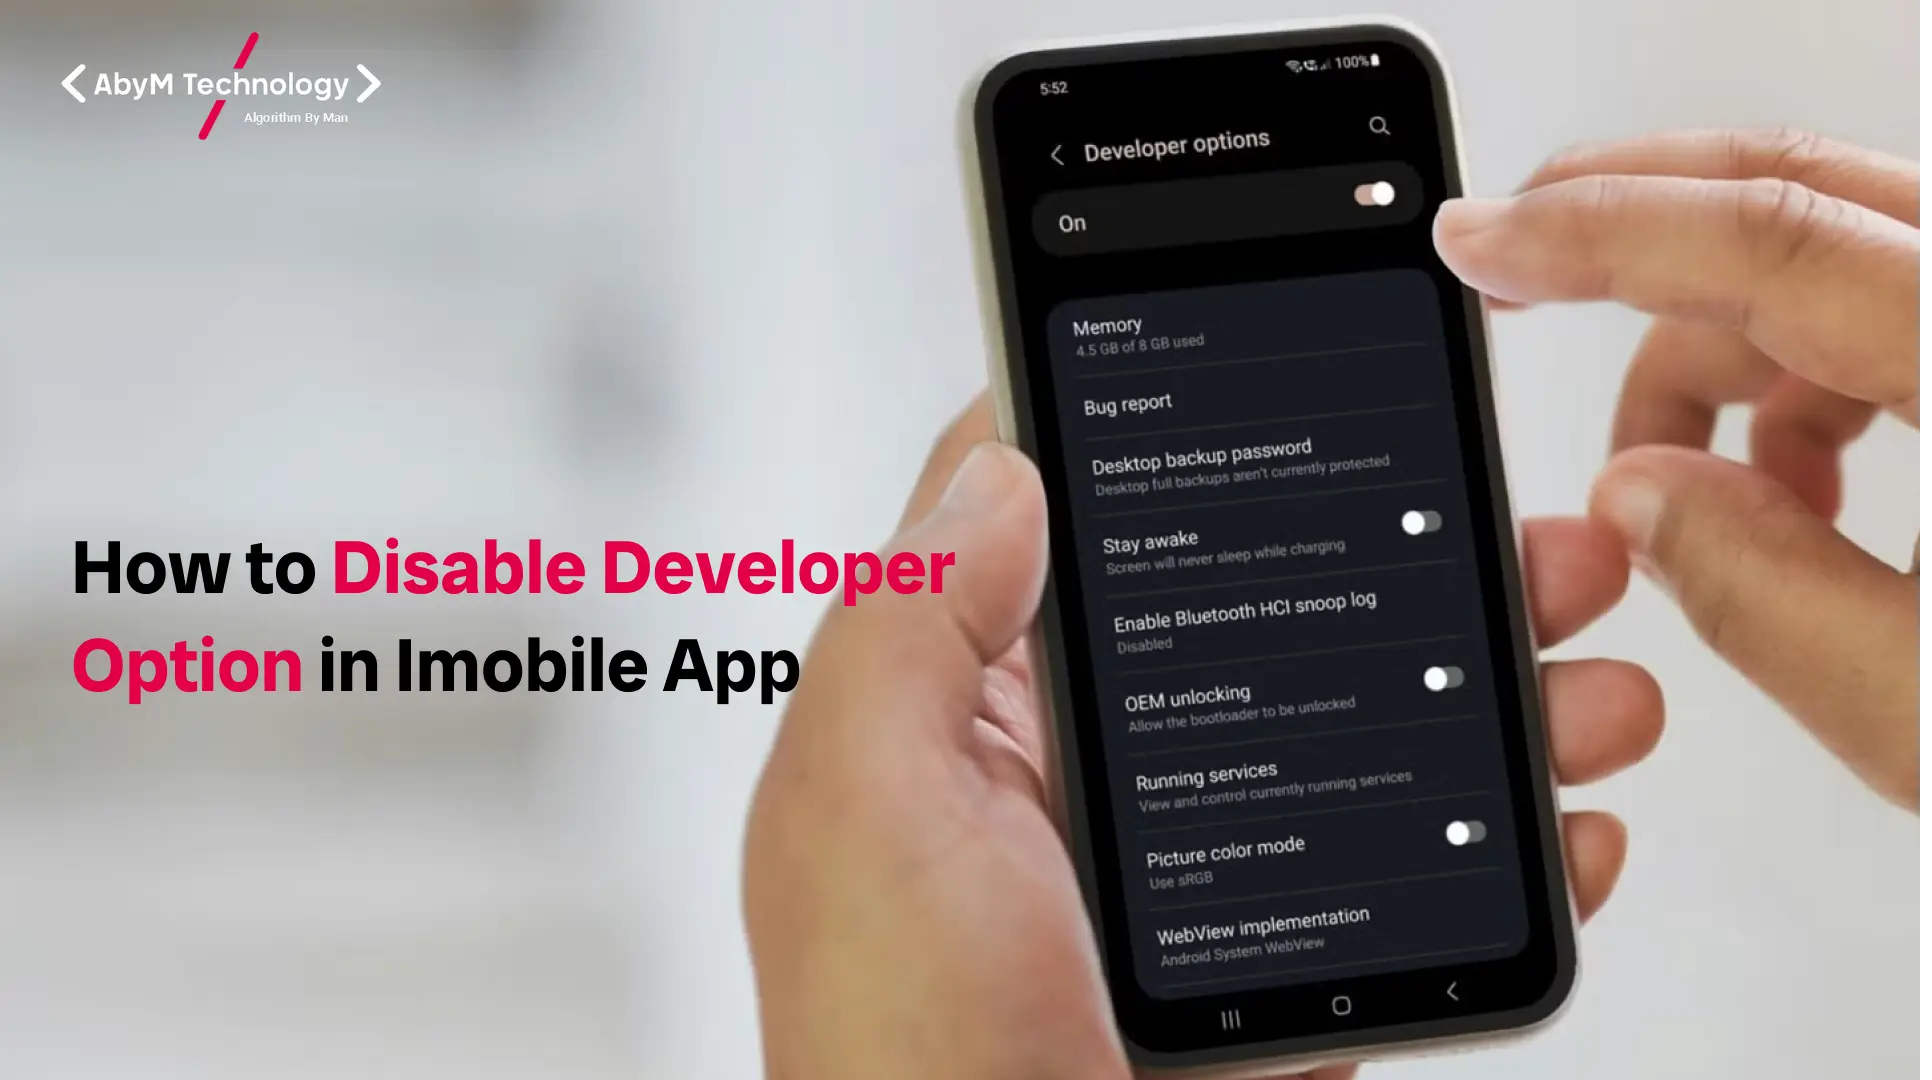
Step 1: Access the Developer Options Menu
- Open the Settings App on your iMobile device.
- Scroll down and tap on About Phone or About Device.
- Find the Build Number entry. Tap it seven times to enable Developer Options. If Developer Options are already enabled, skip this step.
Step 2: Disable Developer Options
- After enabling Developer Options, go back to the Settings menu.
- Scroll down and tap on System.
- Tap on Developer Options.
- You will see a toggle switch at the top of the screen to enable or disable Developer Options. Simply toggle this off.
By doing this, you’ve successfully disabled Developer Options. This action will stop all developer-specific features, including debugging options and other settings that can cause security risks or interfere with app performance.
Step 3: Clearing Data (Optional)
If you want to be more thorough, you can clear all settings related to Developer Options:
- Go to Settings > Apps > System Apps.
- Look for the Developer Options app in the list.
- Tap on it and select Clear Data.
This will remove any residual data or preferences tied to the Developer Options settings.
Additional Steps for Developers: Remove Developer Settings from the Code
If you are developing an iMobile app and want to ensure that the Developer Options are disabled in a production environment, there are a few things you can do in your app’s code. Here are some practices to follow:
1. Disable USB Debugging in the App Code
If you are building a mobile app and want to ensure that USB Debugging is disabled when the app is used in production, you can implement checks in your app’s code to detect if USB Debugging is enabled. If it is, you can block certain functionality or show a warning message to the user.
java
CopyEdit
if (android.os.Debug.isDebuggerConnected()) {
// Disable critical functionality or show warning
Toast.makeText(context, “Please disable developer options.”, Toast.LENGTH_SHORT).show();
}
2. Prevent App from Running in Debug Mode
To prevent your app from being used in Debug mode, you can disable debuggable in the AndroidManifest.xml file. This will prevent developers from running your app in debug mode on production devices.
xml
CopyEdit
<application
android:debuggable=”false”
android:label=”@string/app_name”>
…
</application>
3. Check for Developer Options Programmatically
You can also add code to check whether Developer Options are enabled or not and warn the user. Use the following code snippet to verify if Developer Options are enabled:
java
CopyEdit
boolean developerMode = Settings.Global.getInt(context.getContentResolver(), Settings.Global.DEVELOPMENT_SETTINGS_ENABLED, 0) != 0;
if (developerMode) {
// Disable certain features or prompt user to disable developer mode
}
This will help ensure that your app functions securely and as intended on production devices.
How to Re-enable Developer Options
If you decide to re-enable Developer Options at any time, the process is simple:
- Open the Settings app on your iMobile device.
- Scroll down to About Phone and tap on it.
- Tap on the Build Number entry seven times to re-enable Developer Options.
- Once enabled, you can access Developer Options in the System section of your settings.
Common Issues When Disabling Developer Options
While disabling Developer Options is relatively easy, there are a few common issues that users and developers may encounter:
1. Losing Access to Debugging Features
Disabling Developer Options will prevent features like USB Debugging and other debugging tools from being used. If you rely on these features for app development, you will need to enable Developer Options again temporarily.
2. App Behavior May Change
Some apps may require Developer Options to function properly, especially in development or testing environments. Ensure that the app is thoroughly tested in a production environment where Developer Options are disabled to avoid unexpected behavior.
3. User Confusion
If you are developing an app and your users are unfamiliar with Developer Options, they may not understand why certain features are restricted. It is important to educate users on why certain features should remain disabled for their security and privacy.
Conclusion
Disabling Developer Options on an iMobile device is essential for securing the device and ensuring it functions optimally. Whether you’re a regular user trying to protect your data or a developer looking to prevent security vulnerabilities, following the steps mentioned above will help you achieve your goal. By taking proactive steps to restrict access to Developer Options, you can ensure that your device or app is safe, secure, and functioning smoothly.
Disabling Developer Options is not only crucial for security but also for maintaining the app’s integrity and performance. Make sure to implement best practices both as a user and a developer to keep your devices and apps running securely.
By following this guide, you can ensure that your iMobile app remains free from unnecessary risks and continues to provide a seamless user experience.